 Servo tuning with the tuner and scope
Getting Started
The purpose of this exercise is to provide a basic guide to tuning with the GDK Tuner Tool using the GDK Scope for analysis. The following are the required components to perform this exercise.
- GDK supported Galil controller.
- Motor Amplifier.
- Commutated Motor.
- A computer running the latest version of GDK software.
- A GDK Pro license.
The following steps will cause motion on the selected axis. If the motor goes unstable,
click the stop ![]() button on the Tuner tool to send AB;MO to disable
the feedback loop.
button on the Tuner tool to send AB;MO to disable
the feedback loop.
Connect to the Controller
- To connect the Scope and Tuner to the desired controller, first make sure that the correct address is aliased in the GDK Manager.
- Open the Scope
 and the Tuner
 by clicking their respective icons in the GDK Manager toolbar.
 - The tools should automatically connect to the controller selected in step 1.
- Dock the Scope to the top so that the Scope and Tuner can be viewed
simultaneously. To do this, click the docking icon
 in the Scope and click Dock Top or use the key combination
Alt + Up Arrow.
in the Scope and click Dock Top or use the key combination
Alt + Up Arrow. - To tune axis A, click on the A-axis in the Axis Selector drop down menu in the Tuner.
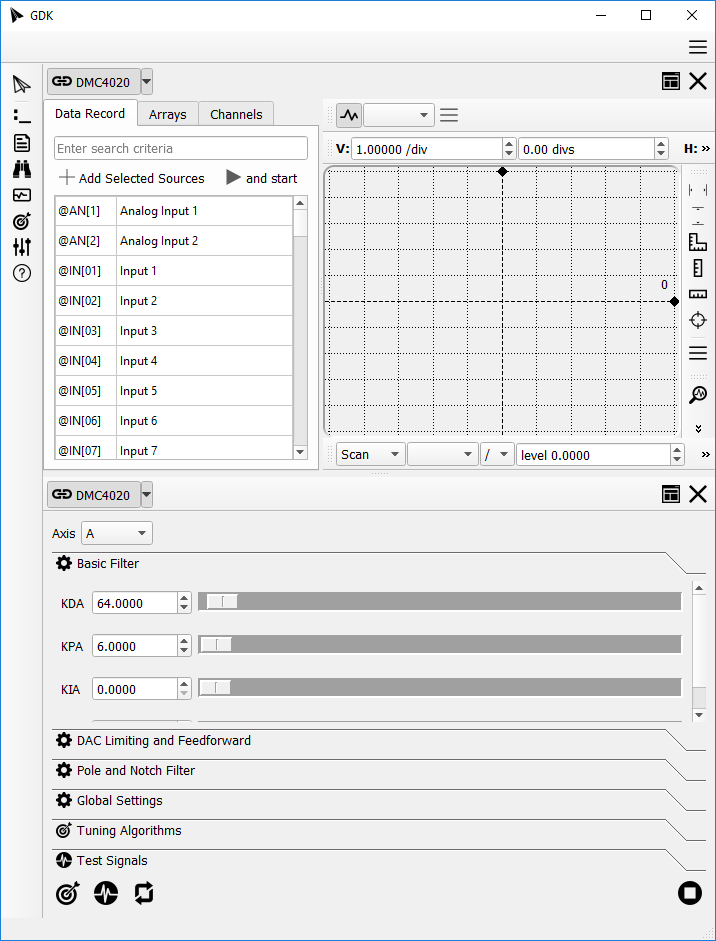
Selecting Scope Channels
- Type RP in the Data Record tab of the Scope to search for the Reference Position channel. Double click on _RPA.
- Type TP and double click on _TPA.
- Type TE and double click on _TEA.
- Type TT and double click on _TTA.
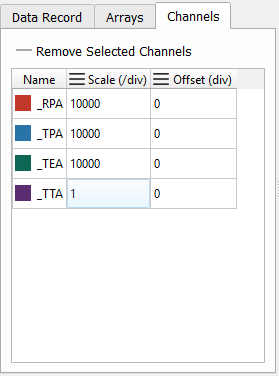
Set Scope Scale
- In the Tuner tool, click on Test Signal and verify that the Step Input signal is selected.
- Click the Send Test Signal
 button.
 - Click the Zoom into waveform extents
 button in the Scope.
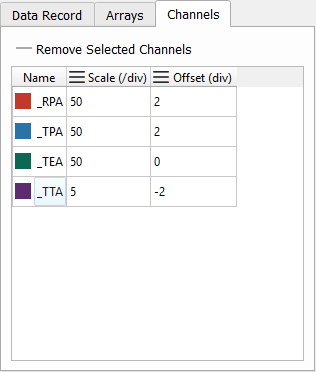
 - In the Channels tab of the channel sidebar (shown above), select rows _RPA, _TPA, and _TEA.
- Click the
 icon next to the Scale
column header and set all three scales to 50.0.
icon next to the Scale
column header and set all three scales to 50.0. - Select only rows _RPA, and _TPA.
- Click the icon next to the Offset
column header and set all both offsets to 2.0.
- Set the scale of _TTA to 5.0 in its scale cell.
Set Scope Trigger
- Set the Trigger Mode to Normal and set the Scope trigger to _RPA
- Set the Trigger Level to 50.0
- Set the Trigger Edge to rising /.

Run the Tuner
- In the Tuner tool, click on Tuning Algorithms and verify that the Auto-Crossover signal is selected.
- Click the Run Autotuner button.
- The Autotuner will run through Galil's Auto-Crossover tuning algorithm and a Test Signal will be sent.
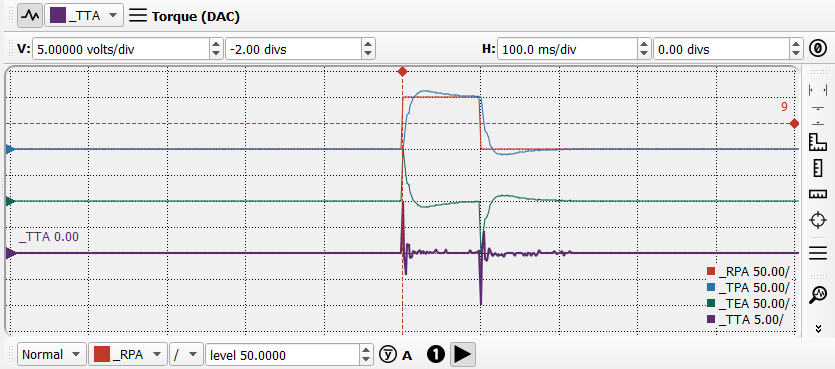
Conclusion
The steps above show how an application can be quickly and easily tuned. The parameters set by the Autotuner will be sufficient for most applications. In some cases, additional manual or fine tuning will be required.
![]()