 The GDK Manager
The GDK Manager provides several software and hardware management utilities.
- Finding and assigning IP addresses to hardware not yet assigned.
- Listing available hardware and connection addresses.
- Selection of addresses which GDK will use with its tools.
- Modification of connection specifics and controllers.
- Connect, disconnect, reconnect of all tools or all tools connected to a controller.
- A global view of all open tools.
- Display and logging of GDK status and errors.
The GDK Manager is a left side, slide-out, drawer. When open, full access to utilities is provided. When closed, the drawer collapses to a toolbar featuring icons for creating new tools.
Click the Manager icon ![]() to open or close
the drawer.
to open or close
the drawer.
 IP Requests and IP Assignment
When GDK launches, it will immediately listen for hardware requiring an IP address. After five seconds, any hardware that is requesting an IP will be listed under the IP Requests item.
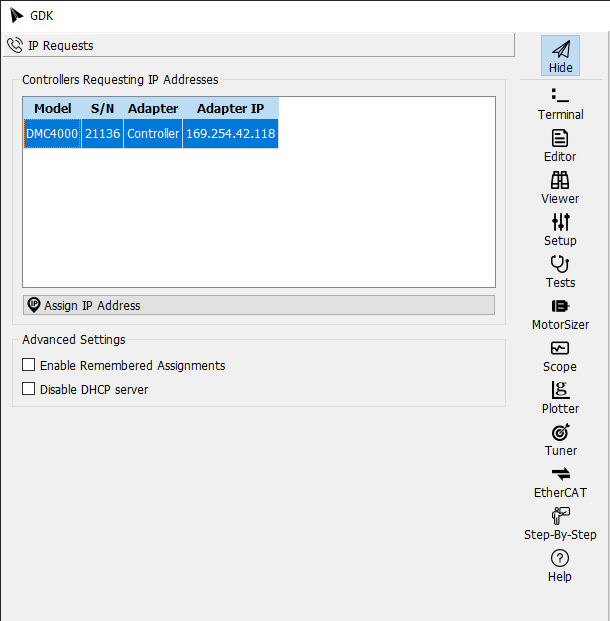
![]() If GDK finds a controller requesting an IP
address, double click its row in the displayed table, or select it and click
the Assign IP Address button to display the assignment dialog.
If GDK finds a controller requesting an IP
address, double click its row in the displayed table, or select it and click
the Assign IP Address button to display the assignment dialog.
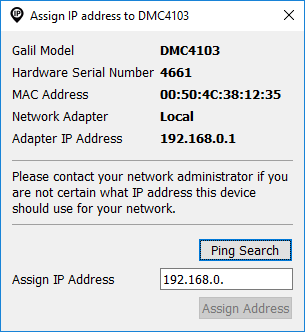
Click the Ping Search button to allow GDK to find an available IP address via Ping. The computer adapter's IP address is used as a starting point for the search.
To check a desired address, type in the address and click Ping Search to ensure the IP address is currently unassigned. If a Ping response is received, GDK will find the next available controllers.
To assign the address in the text box to the listed MAC address, click the Assign Address button.
Advanced Settings
Enable Remembered Assignments
This option is used to keep record of which MAC addresses have been assigned to which IP Addresses in the past. If a known MAC address is seen requesting a new IP address it will be assigned the matching IP address. Enabling this option could save time in certain advanced debugging scenarios where the controller needs to be master reset multiple times. If you are unsure - leave this option unchecked.
Disable DHCP Server
This option is used to turn off GDK's DHCP server and stop listening for incoming IP Requests. This option could be useful for advanced users that have set up their own DHCP server to handle controller IP assignments. Enabling this option will prevent GDK from conflicting with any existing DHCP server. If you are unsure - leave this option unchecked.
 Available Controllers
When GDK launches, it will immediately search for hardware. Any hardware that is found will be listed under the Available Controllers item. All available serial ports are also listed.
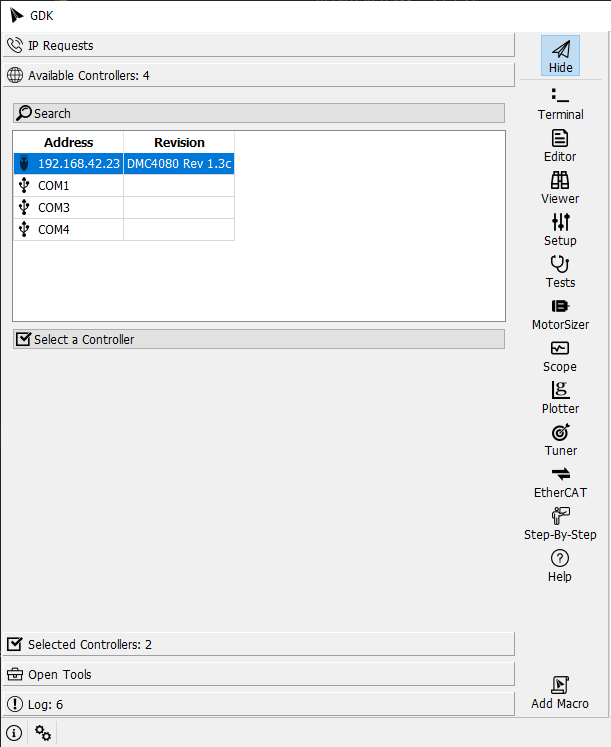
![]() To search again for available hardware,
click the Search button.
To search again for available hardware,
click the Search button.
![]() To select a controller for use in GDK,
double click its row or select one or more addresses from the displayed
table and click the Select Controller button.
To select a controller for use in GDK,
double click its row or select one or more addresses from the displayed
table and click the Select Controller button.
![]() An exclamation mark next to an IP Address
indicates that the controller is not reachable on the network. After assigning
IP addresses on Microsoft Windows, a controller is often temporarily unavailable
because the ARP/neighbor cache takes several seconds to update. Wait 60
seconds and click the Search button to check again for availability.
An exclamation mark next to an IP Address
indicates that the controller is not reachable on the network. After assigning
IP addresses on Microsoft Windows, a controller is often temporarily unavailable
because the ARP/neighbor cache takes several seconds to update. Wait 60
seconds and click the Search button to check again for availability.
 Selected Controllers
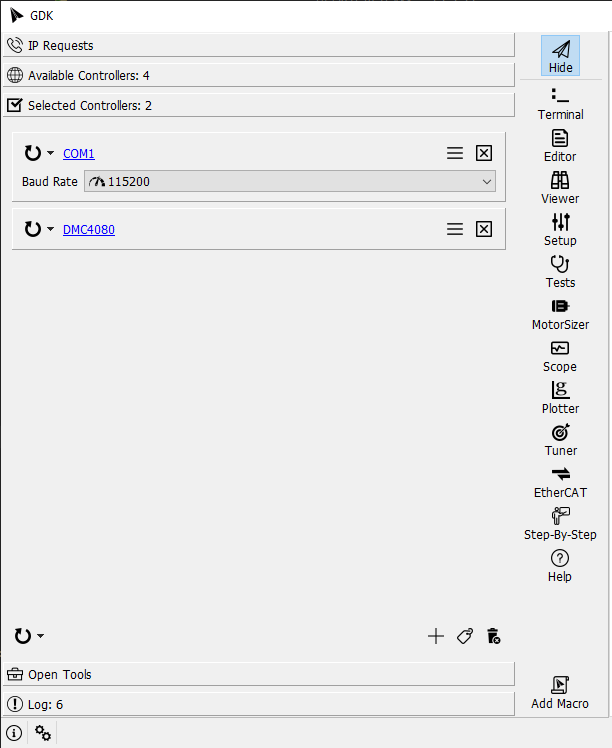
The Selected Controllers item holds all connections available to GDK's tools. Selected Controllers are chosen from the Available Controllers item. A manual address entry feature is also provided.
Controllers selected in one session persist to the next time GDK launches. See the settings dialog to disable this feature.
![]() Use the
Available Controllers item to select controllers from the list
of controllers that GDK finds.
Use the
Available Controllers item to select controllers from the list
of controllers that GDK finds.
Each selected address is displayed as a frame with various user interface elements.
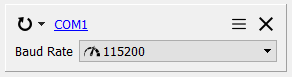
![]() The first element in the frame is a
reconnect button. Use this button to reconnect all tools connected to this
address. Click the downward arrow for more options including disconnecting
and connecting all tools using this address.
The first element in the frame is a
reconnect button. Use this button to reconnect all tools connected to this
address. Click the downward arrow for more options including disconnecting
and connecting all tools using this address.
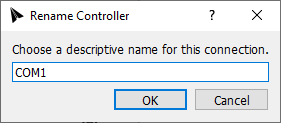
The second element in the frame is a printout of the controller name.
To change a connection's name, click the connection name link in blue and enter the new name.
![]() To view additional connection settings, click
the More settings button to expand the frame.
To view additional connection settings, click
the More settings button to expand the frame.
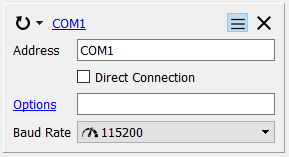
The following is a full list of available settings.
- Address edit box. To change the simple address. Use Options for GOpen() switches.
- Direct Connection checkbox. Check this box to connect directly with GDK's libraries instead of connecting through gcaps.
- Options. Set additional GOpen() options. This setting is used for troubleshooting and debugging. Click the Options hyperlink to bring up a browser window with GOpen()'s switches. Note: GDK tools may append further connection options to the options listed here. For example, the Scope adds --subscribe DR so that it receives data records from the hardware.
- Baud Rate. Only present for serial connections.
![]() To remove a selected controller, click the
"Remove address" button.
To remove a selected controller, click the
"Remove address" button.
At the bottom of the Selected Controller item are a number of buttons to operate on the connection.
![]() Use the global connect button to
reconnect, connect, and disconnect all tools open in GDK.
Use the global connect button to
reconnect, connect, and disconnect all tools open in GDK.
![]() To manually add a connection, click
the "Add connection manually" button.
To manually add a connection, click
the "Add connection manually" button.
![]() To list all selected controllers in a tabular
format, click the "List full addresses" button. Note: GDK
tools may append connection options to the listed base address. For example,
the Scope adds --subscribe DR so that it receives data records
from the hardware.
To list all selected controllers in a tabular
format, click the "List full addresses" button. Note: GDK
tools may append connection options to the listed base address. For example,
the Scope adds --subscribe DR so that it receives data records
from the hardware.
![]() To remove all selected controllers, click
the "Remove all selected controllers" button.
To remove all selected controllers, click
the "Remove all selected controllers" button.
 Open Tools
The Open Tools item consists of an always-visible, vertical, toolbar for launching new tools, and a drawer item for listing and interacting with the currently open tools and loading saved tool layouts.
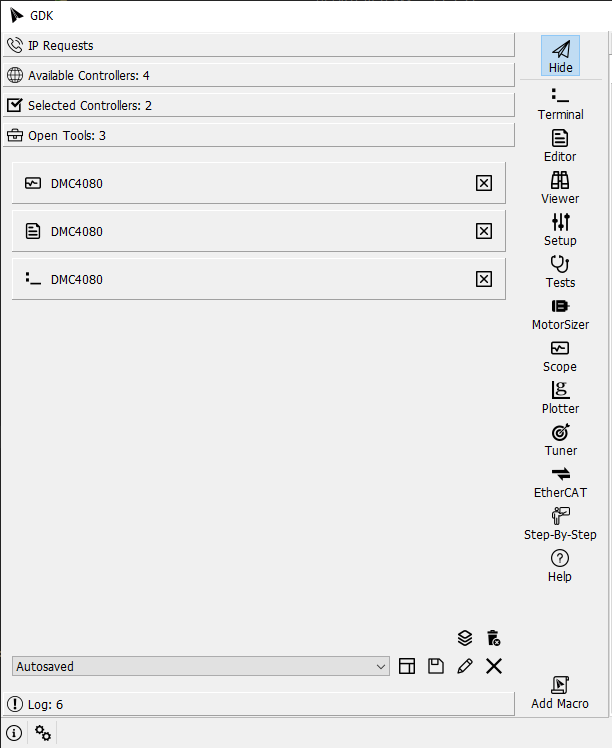
Each open tool is displayed as a frame with the following user interface elements.
- A tool icon designating the tool type.
- The name of the connected tool.
- A close button to close the tool.
Clicking on a tool frame will bring the associated GDK tool to the front and provide a visible indicator. This is useful for locating the tool when using many tools in the central stack, docked, popped out, etc.
![]() To close all open tools, click
the "Remove all tools" button.
To close all open tools, click
the "Remove all tools" button.
Tool Layouts
The Tool Layouts provides a way to save and load tool layouts.
 Click the load layout
button to load the layout currently listed in the menu. Currently open
tools will be closed.
Click the load layout
button to load the layout currently listed in the menu. Currently open
tools will be closed. Click the Save current tool
layout button to save the currently open tools to a layout. GDK will
prompt for a layout name.
Click the Save current tool
layout button to save the currently open tools to a layout. GDK will
prompt for a layout name. Click the Rename tool
layout to change a layout's name. GDK will prompt for a new name.
Click the Rename tool
layout to change a layout's name. GDK will prompt for a new name. Click the Delete tool
layout button to remove the listed layout.
Click the Delete tool
layout button to remove the listed layout.
By default, GDK will automatically save the tool layout upon exit and will reload it when launched. See the Settings dialog to disable this feature.
 The GDK Log
Status messages and errors are recorded in the log.
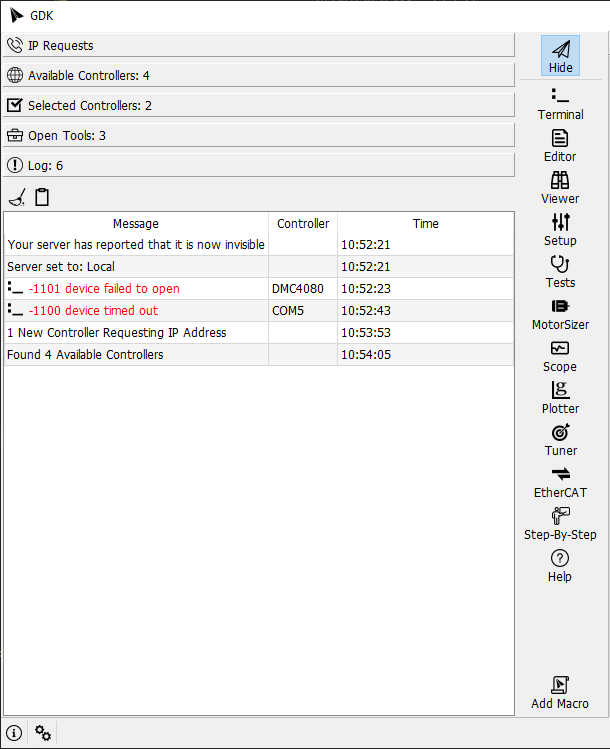
![]() To clear all log messages, click the
"Clear log messages" button.
To clear all log messages, click the
"Clear log messages" button.
![]() To copy all log messages to the clipboard,
click the "Copy log to clipboard" button. The log is copied in CSV format suitable
for import into spreadsheets, etc.
To copy all log messages to the clipboard,
click the "Copy log to clipboard" button. The log is copied in CSV format suitable
for import into spreadsheets, etc.
The GDK Status Bar
All messages that are logged are also printed temporarily in the status bar at the bottom of the main GDK window. When the GDK manager is minimized to the toolbar, errors and status messages are still presented briefly in the status bar.
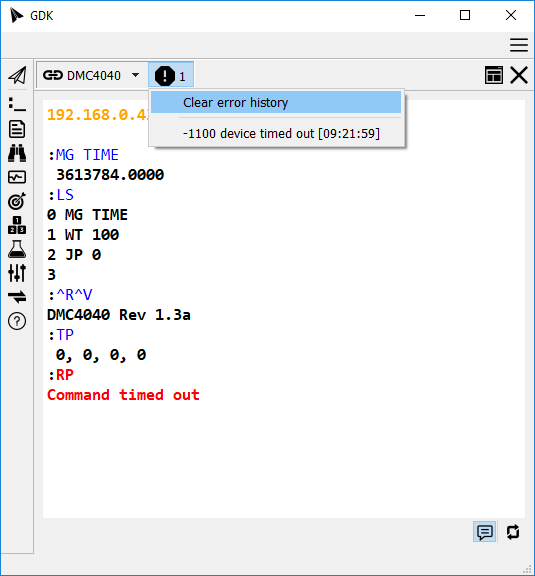
Tool Errors
![]() When tools generate errors, an error
indicator will be shown to the right of the connection link button at the top
left corner of the tool. Click the error icon to view and clear the error(s).
Errors are automatically cleared when the tool is
connected.
When tools generate errors, an error
indicator will be shown to the right of the connection link button at the top
left corner of the tool. Click the error icon to view and clear the error(s).
Errors are automatically cleared when the tool is
connected.
![]()